I apologise to old camera-phone hands who've been down this road before - this will seem a bit obvious, but, for the newcomers around here and to anyone who might not have thought this laterally before, consider that your auto-focus camera in your Symbian smartphone is good enough to replace a Scanner for occasional use.
I discovered this when my old Canon desktop scanner fell into disuse because it plugged in using the PC parallel port and I simply ran out of computers which had one of these. I'm not a big scanner user and didn't miss it much - and, being just an average home, we don't have our own photocopier. Then one day my wife popped into my office with two A4 classroom worksheets: "Can you scan these in, please, and print off a dozen copies?"
Tempting though it was to scarper off to the local library and pay the £2 or so needed for the copying, it suddenly occurred to me that, with a 3 megapixel camera in my Nokia N93, surely that was good enough to produce a good-enough representation of anything put before it? After all, I could focus exactly, even add in some fill-in LED flash if needed. It was time to experiment.
And, you know what? The end result of my improvised workflow was quite good enough for the classroom worksheets, as I'll show below with another example. Most importantly, for a geek like me, it meant yet another use for my smartphone, one more example of convergence that's useful in the real world. Bah, who needs a scanner or photocopier now?
Obviously, there are large numbers of office situations where you do in fact need dedicated bits of kit, but for occasional home use I've now managed without a scanner for almost four years, simply using whichever phone I happened to be using.
Here's what I do, should you also not have thought of this and want to try your hand at using your phone-scanner.
1. You'll need a phone with an auto-focus camera. So anything of the order of the Nokia N93, N95, N82, E90, E71, N85, 5800, Samsung INNOV8, etc. (from just the S60 range), or the Sony Ericsson P1i or P990i (from the old UIQ range). Think of 3 megapixels as a bare minimum here, you'll need this much resolution if you want to scan in text accurately enough to read back later.
To show that all this is possible using the aforementioned minimum, I'm using the small-apertured 3 megapixel, auto-focus camera on the Nokia 5800 for the example. If this phone can work as a scanner then it'll be a piece of cake with most of the rest of the list mentioned above.
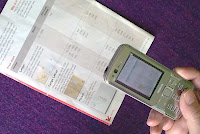
2. Find a nice, light window ledge (but not in direct sunlight) - you want even, bright, white lighting. Don't assume that indoor lights will do, however bright they seem to the naked eye - the human eye is incredibly good at adapting and fooling your brain. Place your document/page flat and then position the phone to fit the page within the frame, as shown here.
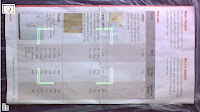
Focus and take the shot, as usual, while trying desperately not to shake the camera as you squeeze the shutter. If the light levels are high enough then you won't have a problem here.
3. Connect up your phone to your desktop (PC or Mac) and transfer the photo using whichever multimedia/image transfer system you prefer. OK, you've now 'scanned' your page, but the JPG file needs a little work on it before you're done. (Again, please remember that this is something of a beginner's tutorial, I'm not trying to patronise those who know all this already!)
You'll need a basic photo manipulation application, I use an old cover-disk version of Paintshop Pro on the PC and the freeware SeaShore on the Mac. If you can't find anything, you can always use Adobe's online app instead for free.
4. Open up the JPG file in your chosen photo app:
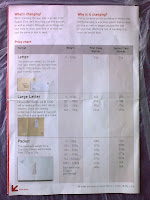
Not bad, a well-focussed, reasonably well lit 3 megapixel photo, if I do say so myself. Here's a cropped part of it, to show the sort of level of detail captured by a 3mp phone camera:
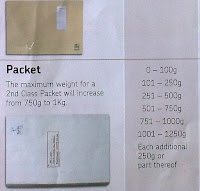
5. Again, pretty good, and certainly good enough for casual scanning/photocopying.
6. For printing out again, assuming that's what you need here, i.e. using the phone-desktop-printer combination as a photocopier, it's usually a good idea to perform a few basic operations on the JPG file. The exact details will vary, depending on your chosen software, but for this sort of use, I typically:
* Crop the edges to within the paper boundaries
* Bring the brightness up a bit and the contrast up a lot
* (if needed) Convert to greyscale or even, as here, to black and white (2 colours) or similar
Here's the sort of thing I end up with:
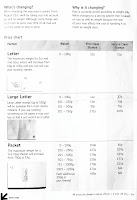
Again, all this is with the rather average camera (by Nseries standards) on the Nokia 5800 - you'll get much better quality still using the likes of the N95 or N82.
It's also worth thinking even more laterally about your phone as a document capture device. In a meeting and can't be bothered to write down everything someone's just scribbled all over a whiteboard? Just stand up and photograph the board and transcribe/refer to it later. At a restaurant and sent off to enquire about the specials of the day? No point in trying to remember them all or write them all down, just photograph the blackboard and read off at your leisure from Gallery later. And so on.


